Zebra R-140 User's Guide
Browse online or download User's Guide for Print & Scan Zebra R-140. Zebra R-140 User`s guide User Manual
- Page / 126
- Table of contents
- TROUBLESHOOTING
- BOOKMARKS
- User's Guide 1
- Zebra R-140 2
- Zebra R-140 User’s Guide iii 4
- TableofContents 6
- CalibratingthePrinter 6
- EstablishingCommunication 7
- PrinterBasics 7
- RoutineCareandAdjustment 8
- Troubleshooting 8
- Introduction 10
- Print Mechanism Capabilities 11
- RFID Capabilities 11
- System Requirements 11
- Unpacking and Inspection 12
- MediaandRibbonRequirements 13
- PowerCord 13
- Printer Anatomy 101 14
- RFID Overview 15
- Tag-it Tags 16
- I·Code Tags 17
- Calibrating the Printer 18
- Types of Media 19
- Continuous Media 20
- Choosing the Print Mode 21
- LoadingtheMedia 22
- Positioning the Media Sensors 23
- Figure 6 24
- BlackMarkSensor 25
- LoadingtheRibbon 26
- OperatorControls 27
- ConfiguringthePrinter 28
- 20 Zebra R-140 User’s Guide 29
- Media and Ribbon Calibration 30
- PrintingaTestLabel 32
- 24 Zebra R-140 User’s Guide 33
- Establishing Communication 34
- CablingRequirements 35
- Printer Basics 36
- Front Panel Display 37
- FrontPanelKeys 38
- Front Panel Lights 39
- Roll Media Loading 40
- Peel-OffMode 41
- Zebra R-140 User’s Guide 33 42
- Figure 17 44
- CutterMode 45
- Zebra R-140 User’s Guide 37 46
- Figure 19 48
- FanfoldMediaLoading 49
- Zebra R-140 User’s Guide 41 50
- RibbonLoading 52
- Figure 22 53
- RibbonRemoval 54
- 46 Zebra R-140 User’s Guide 55
- Configuration 56
- Leaving the Setup Mode 58
- 50 ZebraR-140User’sGuide 59
- *Optionrequired 59
- Zebra R-140 User’s Guide 51 60
- 52 ZebraR-140User’sGuide 61
- Zebra R-140 User’s Guide 53 62
- 54 Zebra R-140 User’s Guide 63
- ZebraR-140User’sGuide 55 64
- 56 Zebra R-140 User’s Guide 65
- Zebra R-140 User’s Guide 57 66
- 58 Zebra R-140 User’s Guide 67
- ZebraR-140User’sGuide 59 68
- 60 Zebra R-140 User’s Guide 69
- Zebra R-140 User’s Guide 61 70
- 62 Zebra R-140 User’s Guide 71
- Zebra R-140 User’s Guide 63 72
- 64 Zebra R-140 User’s Guide 73
- Zebra R-140 User’s Guide 65 74
- * Option required 74
- 66 Zebra R-140 User’s Guide 75
- Zebra R-140 User’s Guide 67 76
- 68 Zebra R-140 User’s Guide 77
- Routine Care and Adjustment 78
- CleaningtheExterior 79
- CleaningtheInterior 79
- CleaningtheSensors 80
- CleaningtheSnapPlate 81
- Zebra R-140 User’s Guide 73 82
- Lubrication 83
- FuseReplacement 83
- 5. Reconnect the power cord 84
- Zebra R-140 User’s Guide 75 84
- Adjustments 85
- PrintheadPressureAdjustment 86
- MediaSensorPositionAdjustment 86
- 78 Zebra R-140 User’s Guide 87
- ErrorConditionHeadOpen 89
- ErrorConditionHeadElementBad 89
- WarningRibbonIn 89
- WarningHeadTooHot 89
- WarningHeadCold 90
- WarningCutterJammed 90
- OutofMemory* 90
- PrintQualityProblems 91
- WrinkledRibbon 92
- Communications 92
- 84 ZebraR-140User’sGuide 93
- RFID Symptoms 94
- 86 Zebra R-140 User’s Guide 95
- PrinterDiagnostics 96
- CANCELKeySelfTest 97
- PAUSE Key Self Test 98
- FEEDKeySelfTest 99
- FEEDKeyandPAUSEKeySelfTest 100
- CommunicationsDiagnosticsTest 100
- AdditionalPrinterDiagnostics 100
- 92 Zebra R-140 User’s Guide 101
- Specifications 102
- Bar Codes 103
- General Specifications 104
- Printing Specifications 105
- Ribbon Specification 105
- Media Specifications 106
- Appendix 108
- RS-232 Interconnections 109
- Zebra R-140 User’s Guide 101 110
- Male DB-25 111
- Parallel Data Port 112
- ZPL II Commands for RFID 113
- ^RT – Read Tag 114
- ^RS – RFID Setup 116
- ^RI - RFID Get Tag Unique ID 116
- Sample ZPL II Label Formats 118
- Format 4: RFID Sample 120
- 112 Zebra R-140 User’s Guide 121
- ZebraR-140User’sGuide 113 122
- 114 ZebraR-140User’sGuide 123
- ZebraR-140User’sGuide 115 124
- 116 Zebra R-140 User’s Guide 125
Summary of Contents
333 Corporate Woods ParkwayVernon Hills, Illinois 60061.3109Telephone 847.634.6700Facsimile 847.913.8766Zebra HouseThe Valley Centre, Gordon RoadHigh
IntroductionHello!Congratulations! You have just purchased the highest quality thermaldemand printer with RFID capability in the industry. Manufacture
FEEDKeyandPAUSEKeySelfTest1.Turnofftheprinter.2.PressandholdtheFEEDandPAUSEkeyswhileturningonthepower.Performingthisselftesttemporarilyresetstheprinte
92 Zebra R-140 User’s Guide
SpecificationsNOTE: Printer specifications are subject to change without notice.Media HandlingnTear-off mode: Labels are produced in strips.nPeel-off
Zebra Programming Language (ZPL II®)Bar Codes94 Zebra R-140 User’s GuidenDownloadable graphics, scalable andbitmap fonts, and label formatsnObject cop
General SpecificationsGeneral Specifications R-140Height 15.5" 393.7 mmWidth 11.15" 283.2 mmDepth 19.5" 495.3 mmWeight (without options
Printing SpecificationsPrinting Specifications R-140Resolution 203 dots/inch (8 dots/mm)Dot size (width x length) 0.0049” x 0.0049” (.125 x .125 mm)Fi
Media SpecificationsMedia Specifications Standard Smart Media (RFID)Minimum label length*Tear-off 0.7" (18 mm)Peel-off 0.5" (13 mm)Cutter 1.
Power Line Cord SpecificationsnThe overall length must be less than 9.8 feet (3.0 meters).nIt must be rated for at least 5 A, 250 V.nThe chassis groun
AppendixPrinter Interface Technical InformationRS-232/RS-422/RS-485 Serial Data PortThe connections for these standard interfaces are made through the
RS-232 InterconnectionsThe printer is configured as Data Terminal Equipment (DTE).Figure 37 illustrates the internal connections of the printer’s RS-2
Print Mechanism CapabilitiesThe Zebra R-140 print mechanism has been designed to print informationon labels, tickets, and tags. It uses a square or re
When the printer is connected via its RS-232 interface to DataCommunication Equipment (DCE) such as a modem, use a standard RS-232(straight-through) i
RS-422/RS-485 InterconnectionsThe printer may be connected to a host by either an RS-422 or an RS-485interface. The DB-25 connector on the rear of the
Parallel Data PortA standard 36-pin parallel connector is available at the rear of the printer forconnection to the data source. Under normal circumst
ZPL II Commands for RFID^WT – Write TagThe format for the ^WT instruction is:^WTb,r,m,w,swhere^WT = Write Tag commandb = Block NumberDefault value: 0O
w = Write protectDefault value: 0 (NOT write protected)Other value: 1 (Write protect)s = Special modeReserved^RT – Read TagThe format for the ^RT inst
f = FormatDefault value: 0 ASCIIOther values: 1 Hexadecimalr = RetriesDefault value: 0Other values: 1 to 10, number of retriesm = motionDefault value:
The second ^RT command string at block 2, reads two blocks of data inASCII format. It retries up to 5 times. The data read will go into the ^FN2locati
The unique ID will be read from the tag and available to print or return tothe host computer.Example:^XA^FO100,100^A0N, 60^FN0^FS^RI0^FS^XZ108 Zebra R
Sample ZPL II Label FormatsZPL II®is Zebra Technologies Corporation’s Zebra ProgrammingLanguage II label design language. ZPL II lets you create a wid
Format 1: Simple Text and a BarcodeLine # Type this label format You’ll get this printout1. ^XA2. ^LH30,303. ^FO20,10^AD^FDZEBRA^FS4. ^FO20,60^B3N,Y,2
nA device, such as a personal computer (PC), for data entry and output oflabel formats to the printer.nA data communication cable to connect the contr
Format 3: Using a Serialized Data FieldLine # Type this label format You’ll get this printout1. ^XA2. ^LH30,303. ^FO20,10^AD^FDZEBRA^FS4. ^FO20,60^B3,
112 Zebra R-140 User’s Guide
IndexZebraR-140User’sGuide 113AAdjustmentsMediasensorposition...77Printheadpressure...77Togglepositioning...76BBarcodes...
114 ZebraR-140User’sGuideLoadingtheribbon...43Lowermediasensoradjustment...16Lubrication...74MMediahandling...93Medial
ZebraR-140User’sGuide 115Ribbonrequirements...4Ribbonspecifications...96SSelftestsCANCELkey...88Communicationsdiagnostics...9
116 Zebra R-140 User’s Guide
333 Corporate Woods ParkwayVernon Hills, Illinois 60061.3109Telephone 847.634.6700Facsimile 847.913.8766Zebra HouseThe Valley Centre, Gordon RoadHigh
MediaandRibbonRequirementsSinceprintqualityisaffectedbymediaandribbon,printingspeeds,andprinteroperatingmodes,itisveryimportanttoruntestsforyourapplic
Make sure that the POWER on/off switch (located at the back of the printer)is in the off position before connecting the power cable to an electricalou
RFID OverviewThe R140 printer contains special hardware necessary to program RFIDtags. To use the RFID capabilities of this printer, you will need the
Tag-it TagsTag-it labels are high frequency (13.56MHz) devices. Tag-it is a read/writeRFID tag with 256 bits of storage capacity for user data. Data i
I·Code TagsI•Code labels are also high frequency (13.56MHz) devices but have 512bits of storage capacity. Data is addressed in sixteen blocks of 32 bi
Calibrating the PrinterThis chapter of the user’s guide is so important that we’ve printed it on adifferent color paper! That way, it will be easy for
Types of MediaNon-Continuous Web MediaNon-continuous web media (refer to Figure 2) refers to individual labelsthat are separated by a gap, notch, or h
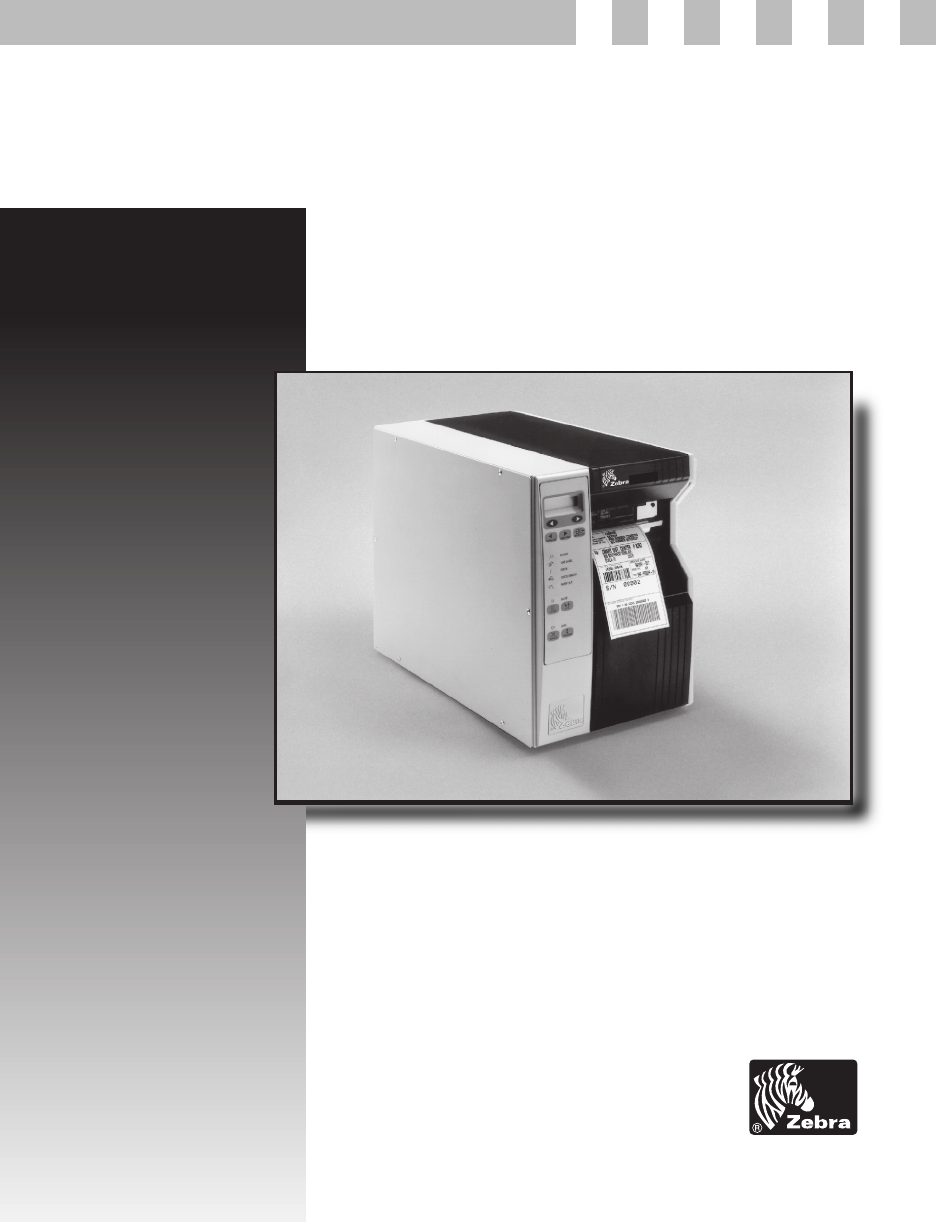
Zebra R-140TMUser's GuideCustomer order # 48040LManufacturer part # 48040LB Rev. 1
Non-Continuous Black Mark MediaNon-continuous black mark media has black marks printed on the back thatindicate the start and end of each label (refer
Choosing the Print ModenTear-off mode allows you to tear off each label, or a strip of labels, afterit is printed.nIn Peel-off mode, backing material
LoadingtheMediaFigure5illustratesonemethodofmedialoading.Formoredetailedinstructions,aswellasinformationabouthowtoloadthedifferenttypesofmediaandtheva
Positioning the Media SensorsThe correct positioning of the media sensors is important. It can make thedifference between a perfect label and a call t
Adjusting the Upper Media SensorRefer to Figure 6. (For clarity, not all printer parts are shown.)1. Remove the ribbon (if it is installed).2. Locate
AdjustingtheLowerMediaSensorPositionthelowermediasensor(refertoFigure7)byslidingitinitsslotuntilitispositionedundertheuppermediasensor.BlackMarkSensor
LoadingtheRibbonToloadribbon,refertoFigure8.Formoredetailedinformation,refertotheinstructionsthatbeginonpage43.ZebraR-140User’sGuide 17Figure8
OperatorControlsPOWERSwitchThePOWERswitchislocatedatthebackoftheprinterabovethepowercordandfuse.Turnontheprinter.FrontPanelThestep-by-stepinstructions
ConfiguringthePrinterTheconfigurationprocedureinthenexttablecontainstheinformationyouneedtogetyourprinterupandrunning,butitisnotcomprehensive.Refertop
Configuring the Software or Printer DriverMany printer settings may also be controlled by your printer’s driver orlabel preparation software. Refer to
Proprietary StatementThis manual contains proprietary information of Zebra Technologies Corporation. It is intended solely for theinformation and use
Media and Ribbon CalibrationNOTE: All steps must be performed in the following procedure, even ifonly one sensor needs to be adjusted.6. Press the SET
10. Press the RIGHT BLACK OVAL key. The front panel display willshow “REMOVE RIBBON CANCEL CONTINUE.”11. Either remove the ribbon or slide it as far f
PrintingaTestLabelToprintatestlabel:19.Turnofftheprinter.20.PressandholdtheCANCELkeywhileturningontheprinter.Aconfigurationlabel,whichshowstheprinter’
24 Zebra R-140 User’s Guide
Establishing CommunicationSystem ConsiderationsInterfacesThe method of interfacing this printer to a data source depends on thecommunication options i
Whencommunicatingviatheparallelport(refertoFigure13),thepreviouslymentionedparametersarenotconsidered.Refertopage57toconfigurethecommunicationparamete
Printer BasicsOperator ControlsThis section discusses the functions of the various controls and indicatorson the printer. The operator should become f
Front Panel DisplayThe front panel display communicates operational status and programmingmodes and parameters.28 Zebra R-140 User’s GuideFigure 14
FrontPanelKeysKey FunctionStartsandstopstheprintingprocess.•Iftheprinterisnotprinting:noprintingcanoccur.•Iftheprinterisprinting:printingstopsoncethec
Front Panel LightsNOTE: If two operating conditions occur simultaneously (for example,one that causes a light to be on constantly and one that causes
Zebra R-140 User’s Guide iii
Roll Media LoadingNOTE: A calibration must be performed when media and ribbon (if used)are first installed in the printer, or when a different type of
Peel-OffModeNOTE:Rewindoptionrequired.NOTE:ThePeel-OffModemaynotbesuitableforsomeRFIDmediatypes.TheusershouldtestforeachapplicationRefertoFigure16.1.R
Zebra R-140 User’s Guide 33Figure 16
RewindMode(forPrintersWithouttheCutterOption)NOTE:Rewindoptionrequired.NOTE:RewindmodemaynotbesuitableforRFIDapplications.RefertoFigure17.1.Removether
Before closing the printhead, make sure:nThe media is positioned against the inside guides.nThe media is taut and parallel with itself and the pathway
CutterModeNOTE:Cutteroptionrequired.RefertoFigure18.1.Opentheprinthead.2.Slidethemediaguideandmediasupplyguideasfarfromtheprinterframeaspossible.Flipd
Zebra R-140 User’s Guide 37Figure 18
RewindMode(forPrintersWiththeCutterOption)NOTE:Cutterandrewindoptionsrequired.NOTE:RewindmodemaynotbesuitableforRFIDapplications.RefertoFigure19.1.Rem
Before closing the printhead, make sure:nThe media is positioned against the inside guides.nThe media is taut and parallel with itself and the pathway
FanfoldMediaLoadingNOTE:Acalibrationmustbeperformedwhenmediaandribbon(ifused)arefirstinstalledintheprinter,orwhenadifferenttypeofmediaorribbonisbeingu
iv Zebra R-140 User’s Guide
Zebra R-140 User’s Guide 41Figure 20Figure 21
Removing the Label Backing MaterialSince the rewind spindle holds the backing from a standard-size media roll,we recommend that you perform this proce
RibbonLoadingToloadribbon,refertoFigure22andfollowtheprocedurebelow.NOTE:Useribbonthatisatleastaswideasthemedia.Thesmoothbackingoftheribbonprotectsthe
7. Before wrapping the ribbon around the ribbon take-up spindle, ensure thatthe arrow on the knob aligns with the indented notch (see Figure 23inset).
RibbonRemovals1.Breaktheribbonasclosetotheribbontake-upspindleaspossible.2.RefertoFigure23.Whileholdingtheribbontake-upspindle,turntheknob(1)clockwise
46 Zebra R-140 User’s Guide
ConfigurationAfteryouhaveinstalledthemediaandribbonandthepower-onselftest(POST)iscomplete,thefrontpaneldisplaywillshow“PRINTERREADY.”(Iftheprinterfail
Changing Password-Protected ParametersCertain parameters are password-protected by factory default.CAUTION: Do not change password-protected parameter
Leaving the Setup ModeYou can leave the program mode at any time by pressing the SETUP/EXITkey. The “SAVE CHANGES” display will appear. There are five
ConfigurationandCalibrationSequence50 ZebraR-140User’sGuidePress DisplayShows Action/Explanation---- PRINTERREADY Normalprinteroperation.SettingPrintP
TableofContentsIntroductionHello!...1PrintMechanismCapabilities...2RFIDCapabilities...
Zebra R-140 User’s Guide 51Press Display Shows Action/ExplanationMEDIA TYPESetting Media Type Press the RIGHT or LEFT BLACK OVAL keyto display other c
52 ZebraR-140User’sGuidePress DisplayShows Action/ExplanationPRINTWIDTHSettingPrintWidthPresstheRIGHTBLACKOVALkeytoincreasethevalue,presstheLEFTBLACKO
Zebra R-140 User’s Guide 53Listing Printer InformationPress Display Shows Action/ExplanationLIST FONTSList Fonts Press the RIGHT BLACK OVAL key to pri
54 Zebra R-140 User’s GuidePress Display Shows Action/ExplanationINITIALIZE CARDInitialize Memory CardCAUTION: Perform this operation only when it is
ZebraR-140User’sGuide 55MediaandRibbonSensorCalibrationNOTE:Beforeyoubeginthisprocedure,makesurethatthemaximumlengthissettoavalueequaltoorgreaterthant
56 Zebra R-140 User’s GuidePress Display Shows Action/ExplanationMEDIA ANDRIBBONCALIBRATEMedia and Ribbon Sensor Sensitivity Press NEXT/SAVE to skipth
Zebra R-140 User’s Guide 57Setting Communication ParametersCommunication parameters must be set correctly for the printer to communicate with the host
58 Zebra R-140 User’s GuidePress Display Shows Action/ExplanationPARITYSetting Parity Press the RIGHT or LEFT BLACK OVAL key todisplay other choices.D
ZebraR-140User’sGuide 59Press DisplayShows Action/ExplanationNETWORKIDSettingNetworkID PresstheLEFTBLACKOVALkeytomovetothenextdigitposition,presstheRI
60 Zebra R-140 User’s GuideSelecting Prefix and Delimiter CharactersPrefix and delimiter characters are 2-digit hex values used within the ZPL/ZPL II
LoadingtheRibbon...17OperatorControls...18POWERSwitch...18Fro
Zebra R-140 User’s Guide 61Selecting ZPL ModePress Display Shows Action/ExplanationZPL MODESelecting ZPL Mode Press the RIGHT or LEFT BLACK OVALkey to
62 Zebra R-140 User’s GuideLabel Positioning ParametersPress Display Shows Action/ExplanationBACKFEEDBackfeed Sequence Press the RIGHT or LEFT BLACK O
Zebra R-140 User’s Guide 63Press Display Shows Action/ExplanationHEAD TESTCOUNTSetting the Head Test Count Press the LEFT BLACK OVALkey to move to the
64 Zebra R-140 User’s GuidePress Display Shows Action/ExplanationAPPLICATORPORTSetting the Applicator Port Press the RIGHT or LEFT BLACKOVAL key to di
Zebra R-140 User’s Guide 65Press Display Shows Action/ExplanationLCD ADJUSTLCD Display Adjustment Press the LEFT BLACK OVAL key todecrease the value (
66 Zebra R-140 User’s GuidePress Display Shows Action/ExplanationIP RESOLUTION*IP Resolution Press the RIGHT or LEFT BLACK OVAL key todisplay other ch
Zebra R-140 User’s Guide 67Press Display Shows Action/ExplanationLANGUAGESelecting the Display Language Press the RIGHT or LEFT BLACKOVAL key to displ
Press Display Shows Action/ExplanationDARKNESSYou are now back at the first parameter in the configurationsequence.NOTE: If you pressed the NEXT/SAVE
Routine Care and AdjustmentCleaningThe following table provides a brief cleaning schedule. Specific cleaningprocedures are provided on the following p
CleaningtheExteriorTheexteriorsurfacesoftheprintermaybecleanedwithalint-freecloth.Donotuseharshorabrasivecleaningagentsorsolvents.Ifnecessary,amilddet
ConfigurationEnteringtheSetupMode...47ChangingPassword-ProtectedParameters ...48LeavingtheSetupMode...
4.Rotatetheplatenrollerandcleanthoroughlywithsolventandanapplicator.5.Brush/vacuumanyaccumulatedpaperlintanddustawayfromtherollers.6.Reloadribbonand/o
CleaningtheSnapPlateCleanthesnapplatetoremovelabeladhesiveoralabelthathasadheredtotheundersideofthesnapplate.RefertoFigure26.1.Carefullypushthetabsont
Zebra R-140 User’s Guide 73Figure 26Figure 27
CleaningtheCutterModule(Forprintersequippedwiththeoptionalcutter.)Iflabelsarenotbeingcutproperlyorifthecutterjamswithlabels,turnofftheprinterpowerandu
4. Snap the fuse holder back into position.5. Reconnect the power cord.If the new fuse fails right away, the printer has an internal componentfailure
AdjustmentsToggle PositioningBoth toggles should be positioned so that they provide even pressure on themedia. The toggles are positioned by sliding t
PrintheadPressureAdjustmentThisadjustmentmaybenecessaryifprintingistoolightononesideorifthickmediaisused.RefertoFigure30.1.Performthetogglepositioning
78 Zebra R-140 User’s Guide
TroubleshootingLEDErrorConditionsandWarningsErrorConditionRibbonOutErrorConditionPaperOutZebraR-140User’sGuide 79Problem SolutionInthermaltransfermode
ErrorConditionHeadOpenErrorConditionHeadElementBadWarningRibbonInWarningHeadTooHot80 ZebraR-140User’sGuideProblem SolutionTheprintheadisnotfullyclosed
SpecificationsMediaHandling...93Options ...93ZebraProgrammingLanguage(ZPLII®)...
WarningHeadColdWarningCutterJammedOutofMemory*ZebraR-140User’sGuide 81Problem SolutionTheprintheadisundertemperature.Continueprintingwhiletheprinthead
PrintQualityProblemsGeneralPrintQualityIssuesGraylinesonblanklabelswithnoconsistentpatternLight,consistentverticallinesrunningthroughallofthelabelsInt
WrinkledRibbonCommunicationsAlabelformatwassenttotheprinterbutnotrecognized.TheDATAlightdoesnotflash.ZebraR-140User’sGuide 83Problem SolutionTheribbon
Alabelformatwassenttotheprinter.Severallabelsprint,thentheprinterskips,misplaces,misses,ordistortstheimageonthelabel.Alabelformatwassenttotheprinterbu
RFID SymptomsProblem Diagnosis SolutionRFID tags not programming(general).Printer not set-up properlyPrint a Configuration label(Cancel Key Self Test)
Problem Diagnosis SolutionNO TAG Error Message(Continued)Tags have metal/aluminumin them.Confirm that the tags meetrequirements (i.e. no metal/aluminu
PrinterDiagnosticsPower-OnSelfTestApower-onselftest(POST)isperformedautomaticallyeachtimetheprinteristurnedon.Duringthistestsequence,thefrontpanelligh
CANCELKeySelfTestThisselftestprintsalistingoftheconfigurationparameterscurrentlystoredintheprinter’smemory.SeeFigure31(dependingontheoptionsordered,yo
PAUSE Key Self TestThis self test can be used to provide the test labels required when makingadjustments to the printer’s mechanical assemblies. See t
FEEDKeySelfTestSeeFigure33.1.Turnofftheprinter.2.PressandholdtheFEEDkeywhileturningonthepower.TheFEEDkeyselftestprintsoutatvariousdarknesssettingsabov
Related products and manuals for Print & Scan Zebra R-140
 (44 pages)


 (20 pages)
(53 pages)
(60 pages)
(168 pages)
(144 pages)
(130 pages)
(84 pages)
(73 pages)
(4 pages)
(20 pages)
(154 pages)
(4 pages)
(2 pages)
(2 pages)
(1 pages)
(30 pages)
(20 pages)
(53 pages)
(60 pages)
(168 pages)
(144 pages)
(130 pages)
(84 pages)
(73 pages)
(4 pages)
(20 pages)
(154 pages)
(4 pages)
(2 pages)
(2 pages)
(1 pages)
(30 pages)
© 2020, manymanuals.com. All rights reserved. | 2.084 s |
 Manymanuals.com
 Manymanuals.de
 Manymanuals.fr
 Manymanuals.it
 Manymanuals.pl
 Manymanuals.cz
 Manymanuals.es
 Manymanuals-pt.com
Comments to this Manuals